INTRODUCTION
The TrolMaster Carbon-X system is designed to protect customers and workers near commercial indoor growing areas
that use supplemental CO2, satisfying all local and state regulations. The system has a modular structure,
allowing you to customize the system to fit your unique requirements, being able to monitor up to 13 zones.
The Carbon-X system offers both high level alerts, as well as low level alerts. The sensors will constantly monitor
the CO2 level of the areas. If unsafe levels of CO2 are detected, the system can shut down CO2 flow, vent the area,
turn on visual and audible alarms and even send signals to a fire alarm panel.
The system can control up to 40 outputs total. Each output can be linked to an individual sensor or all sensors for
a customized programming. There are five types of outputs that can be connected to the system.
The AS-1 and AS-2 CO2 Alarm Stations are audio-visual alarm modules.
The DSE-1 CO2 Emergency Stop Station controls the main Co2 solenoid. It will automatically shut it off if any fault
or high CO2 level is detected
The DSC-1 is a 120V controlled outlet that turns on devices like ventilation fans if any fault or high CO2 level is
detected.
The DSD-1 is a Dry Contact output. Both N/O and N/C connections are provided on the DSD-1 and it can interface to
the fire alarm panel.
The Carbon-X system also provides internet connectivity to a cloud service that will send push alerts to
Trolmaster’s smart phone APP and send alert emails to email accounts.
NOTICES
Here are some important things to consider when using the Carbon-X Alarm System.
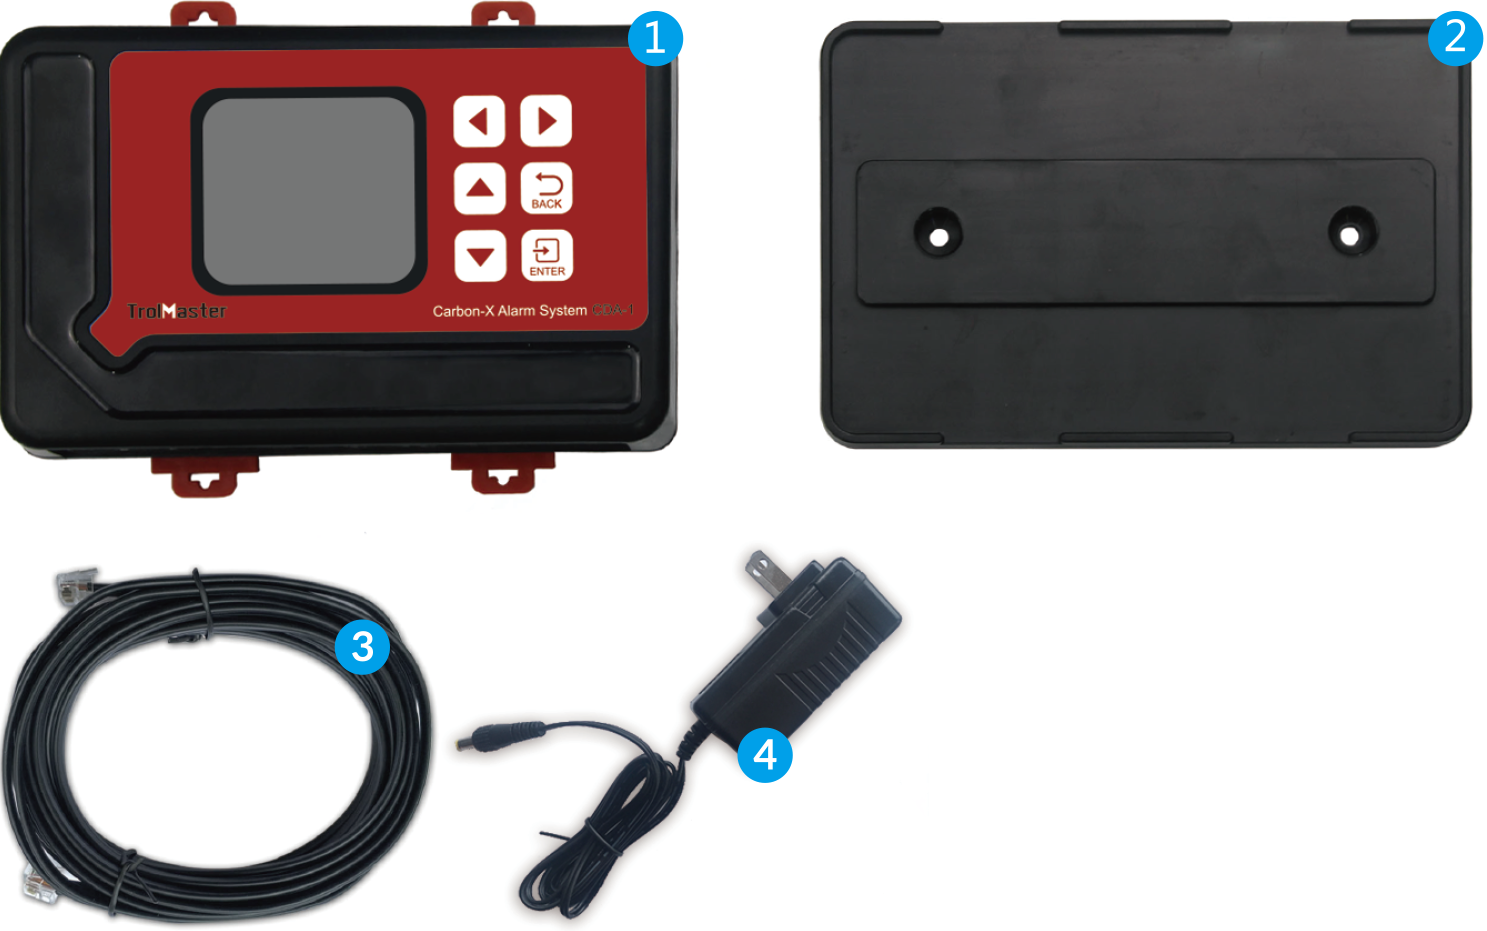
COMPONENTS
INSTALLATION
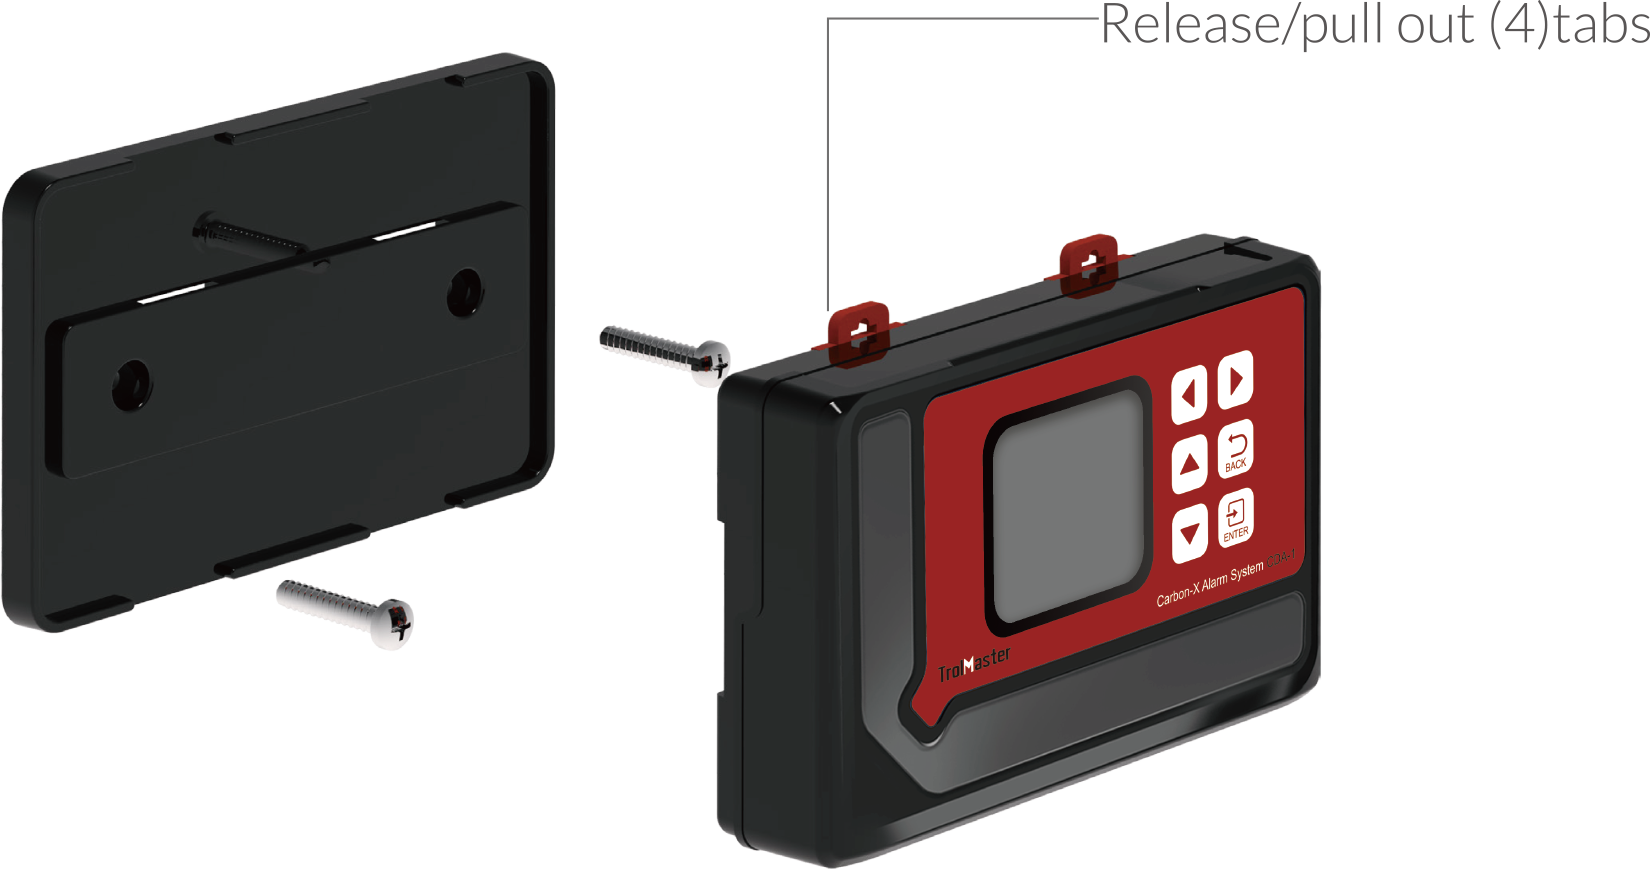
Determine where to locate the main controller. The controller comes with a simple to use DIN type bracket. Pull the
4 tabs outward to release the bracket from the unit, mount the bracket to a wall or surface, place the unit back on
the bracket and press the 4 tabs back in to lock the unit in place.
CONNECTIONS
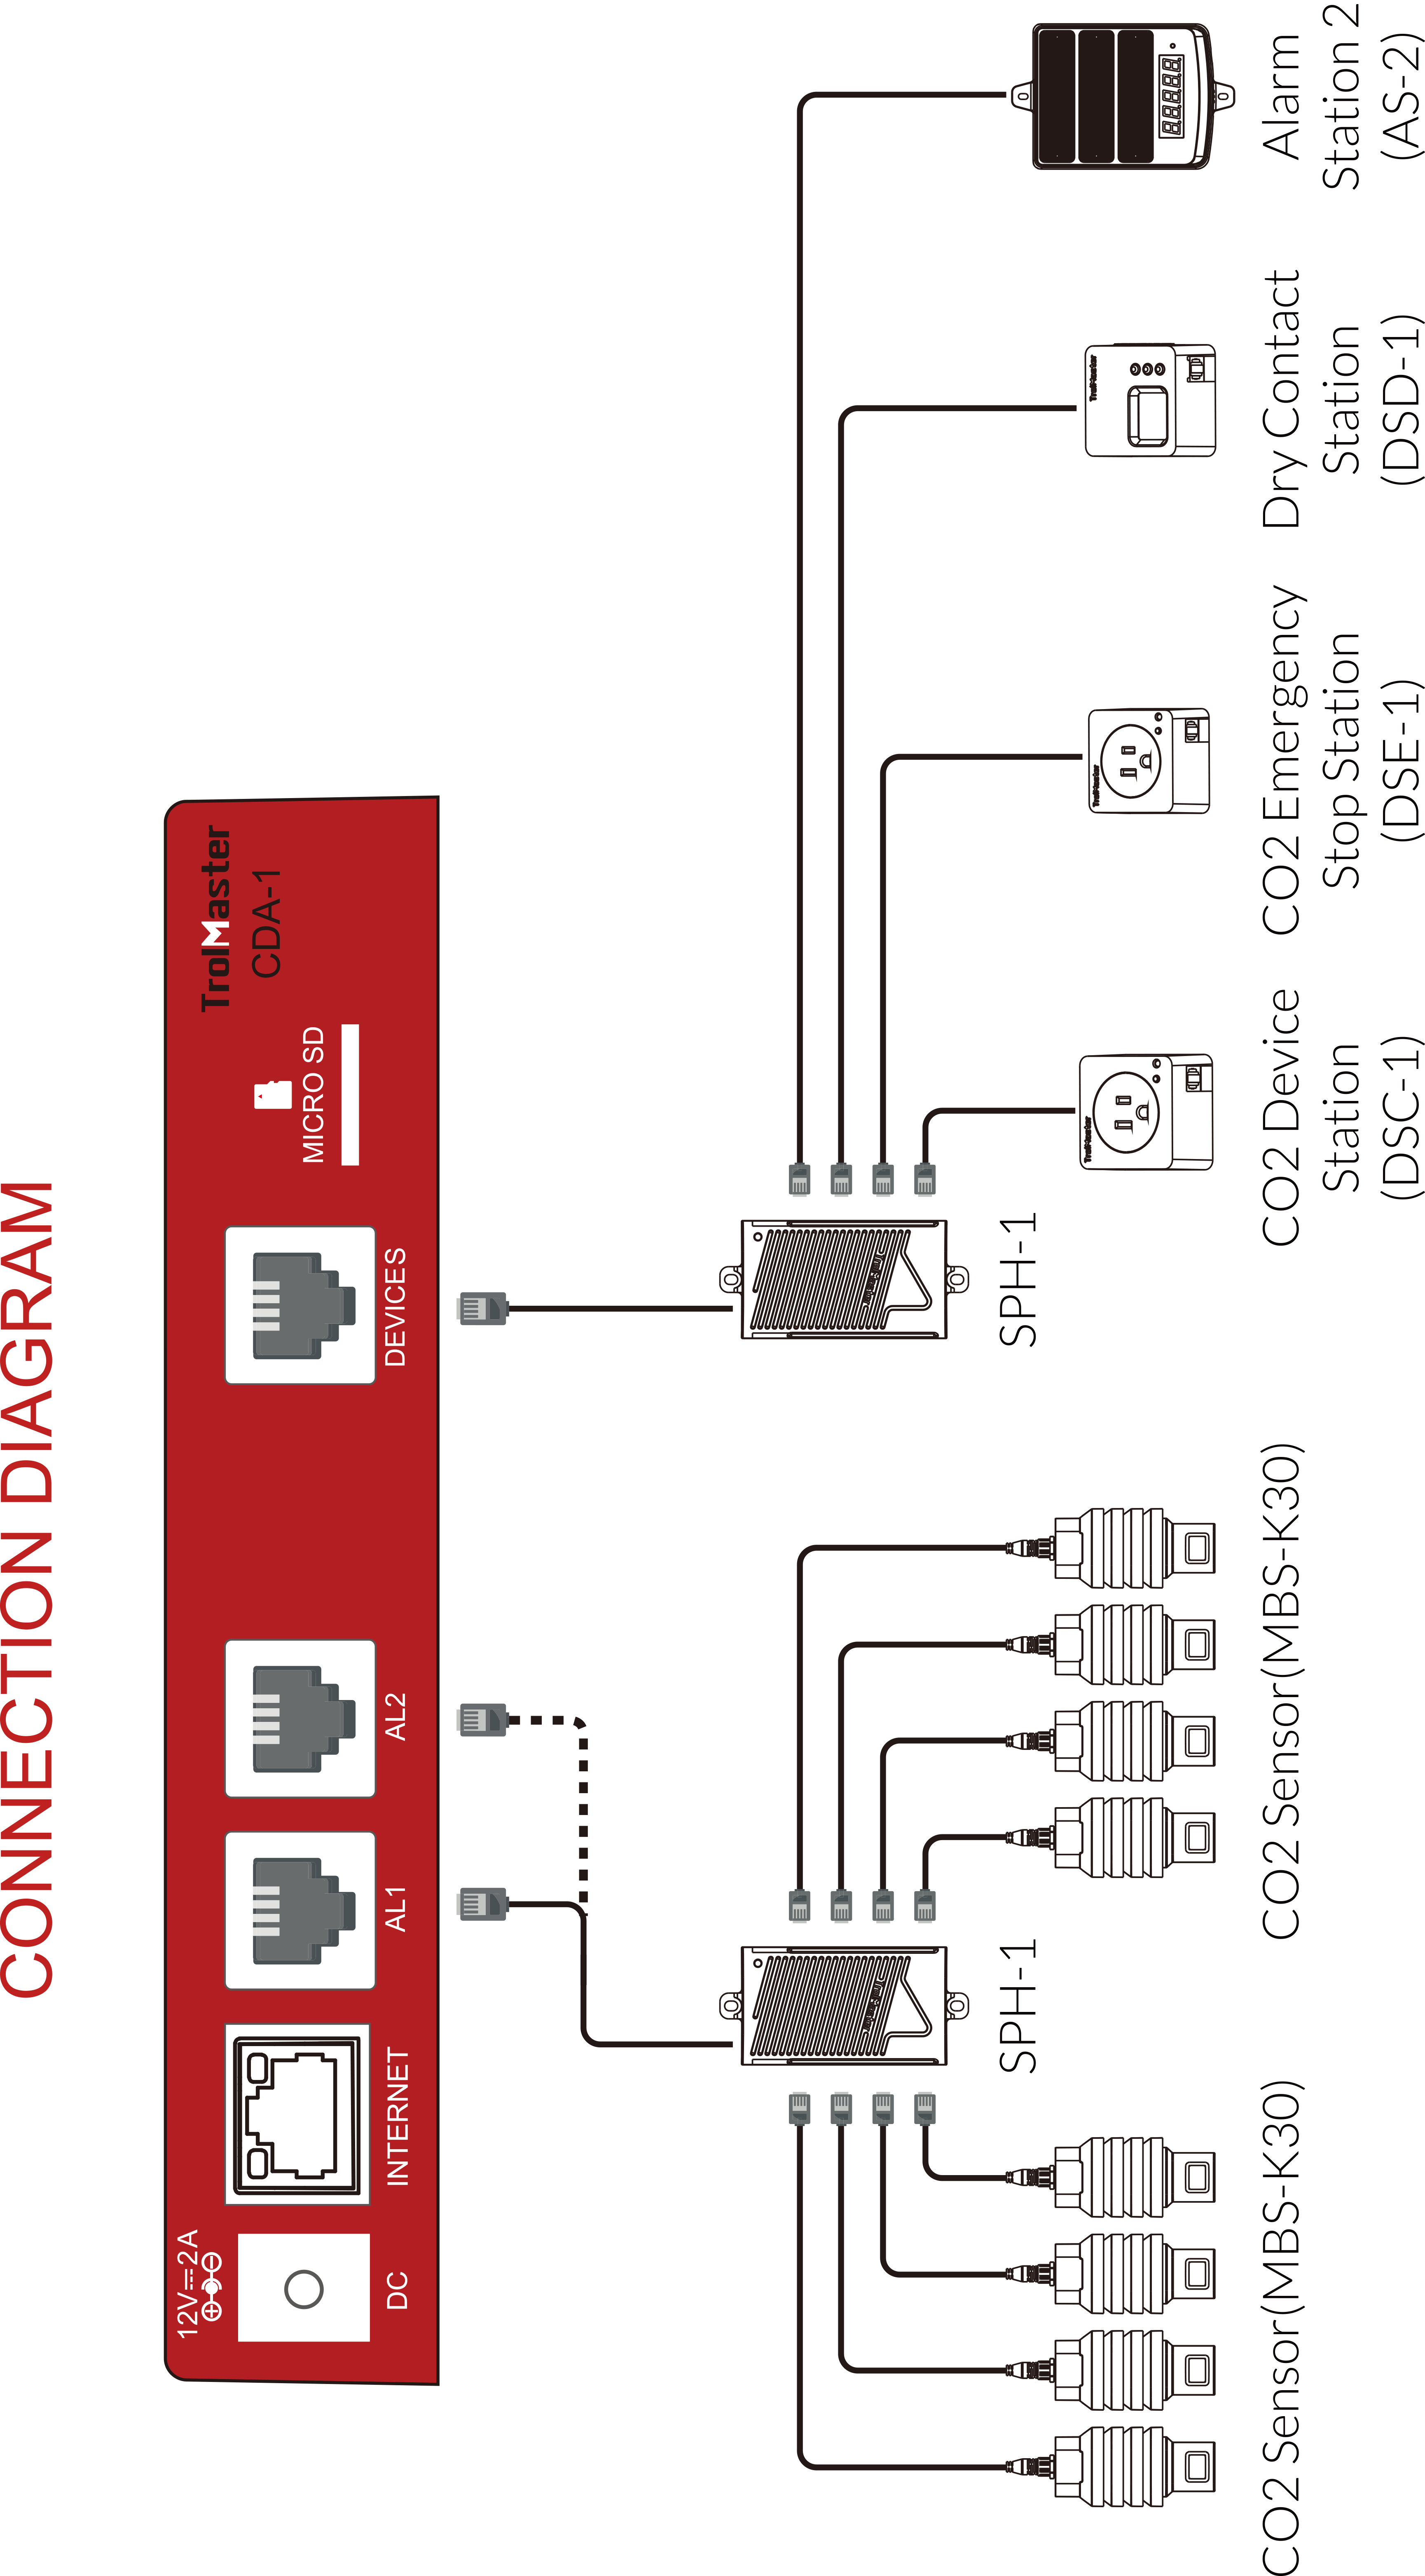
*NOTE : All Sensors and Device Station need be addressed after
connected to
the
system by pressing the addressing button on each sensors and stations.
BUTTONS
The Carbon-X System is extremely easy to use. The backlit 128x128 LCD display will provide
the user with the current conditions and access all settings. All settings are accessed
by using the 6 pushbuttons on the front of the unit. The button functions are described below.
UP / DOWN : The Up and Down buttons move the cursor up and down through the
menu items.
LEFT / RIGHT : The LEFT and RIGHT buttons move the cursor to left or right.
BACK : The Back button goes backwards to exit the current menu item.
ENTER : The Enter button is used to open the menu item to be changed as well
as
to accept and “enter” the new setpoint into memory.
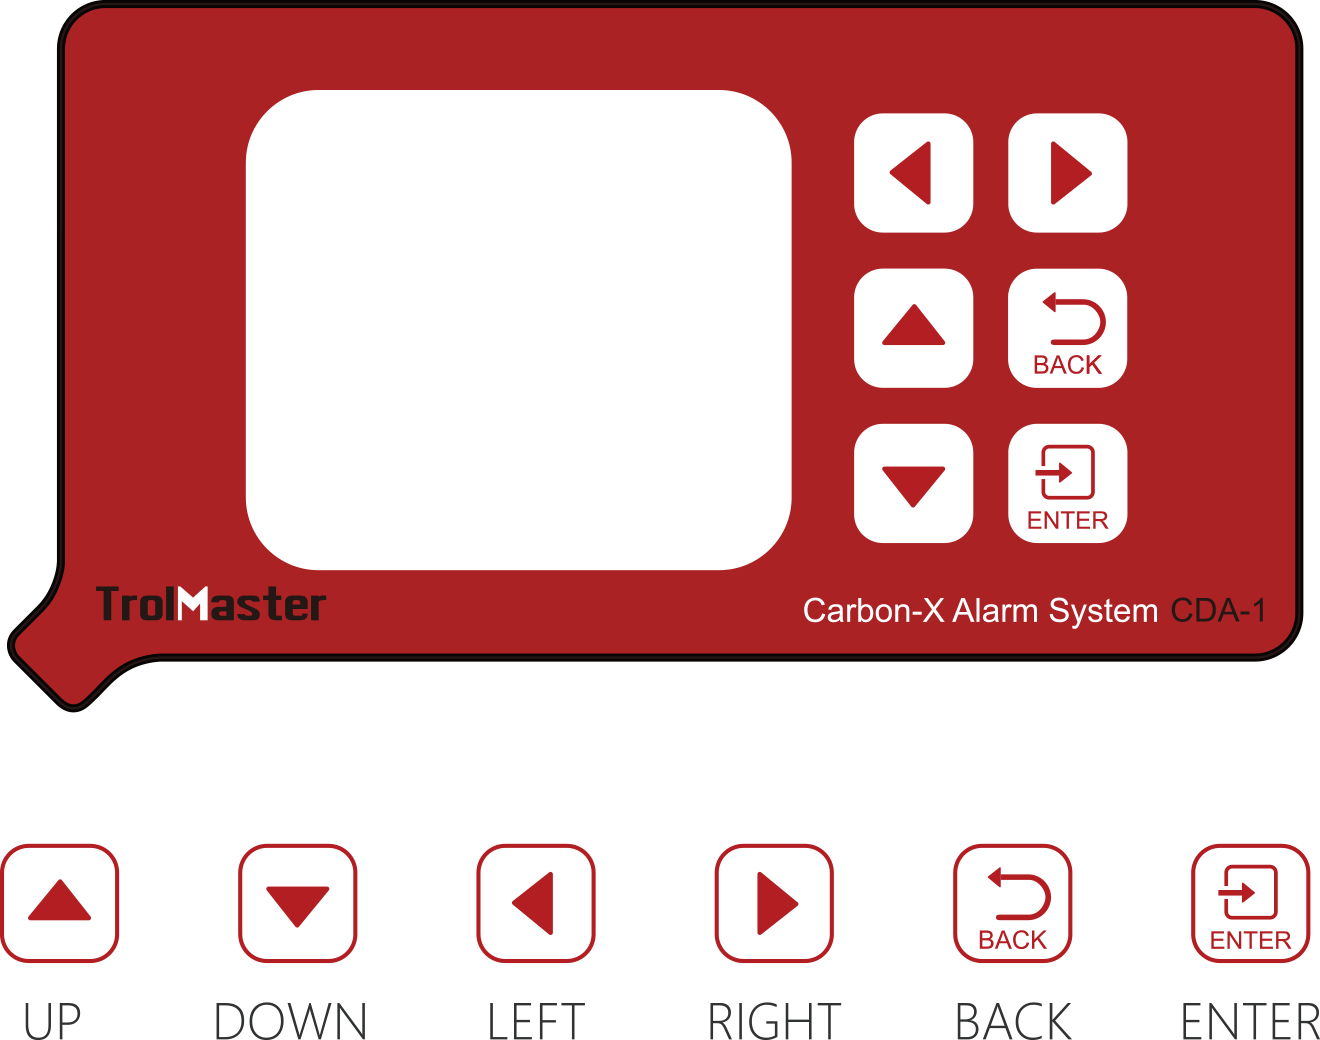
Familiarize yourself with the function of the 6 buttons on the front of the Carbon-X Alarm System
in order to able to access settings.
START SETTINGS
Once you have connected all sensors and device stations to the Carbon-X Alarm System, we can start using the unit.
Connect the plug-in power supply to the power connector on the bottom of the Carbon-X Alarm System, Carbon-X Alarm
System will turn on and boot up.
Press addressing buttons on each sensors and stations to address them into the system.
MAIN MENU
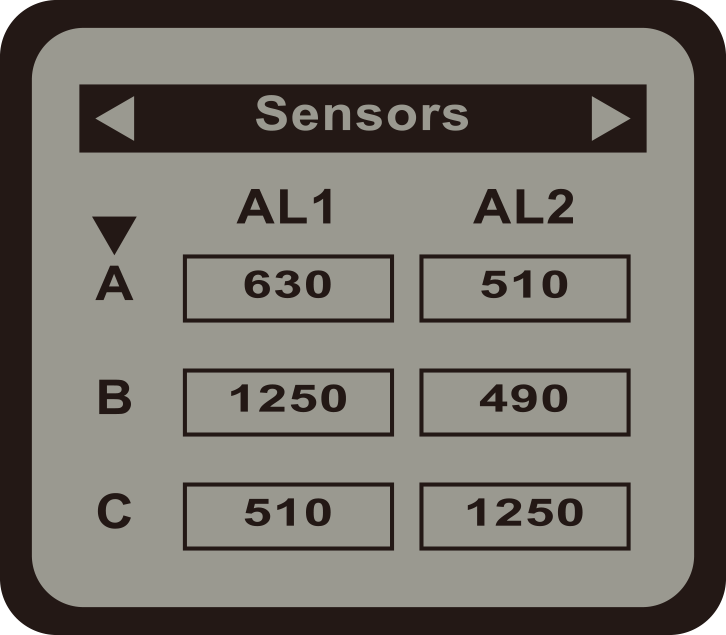
On main menu interface, the LCD screen will display the current reading of all sensors connected.
If the Internet is connected, the network signal icon will be highlighted on the screen.
Press LEFT button to enter the Device List page.

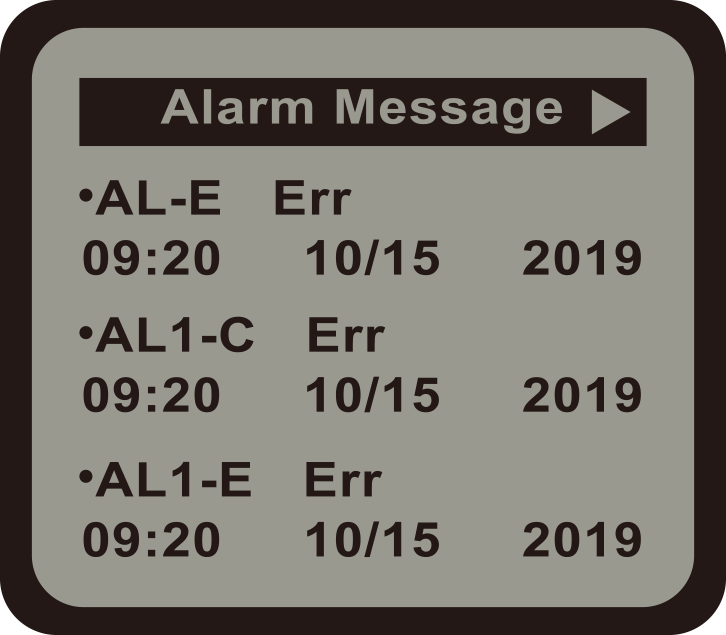
Press RIGHT button to enter the Alarm Massage page.
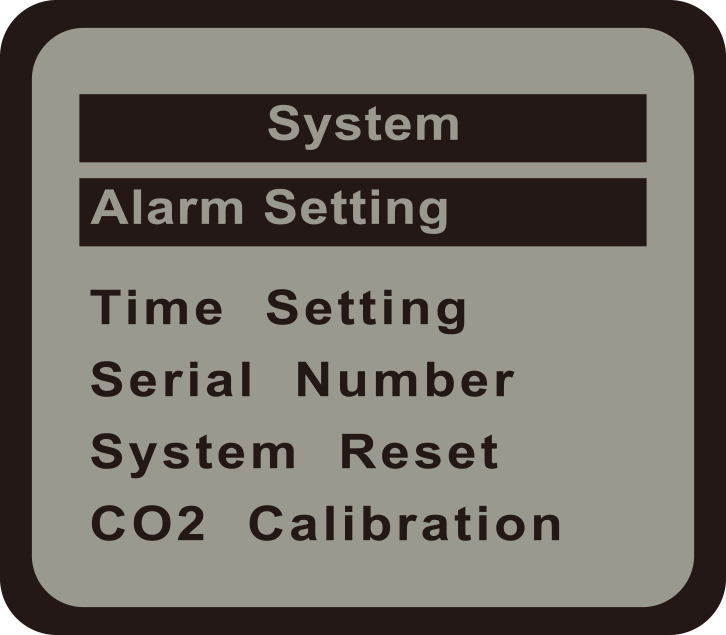
SYSTEM SETTING PAGE
On the main page, press ENTER button to get access to the SETTING page as shown below. Press UP and DOWN buttons to
select the setting and press ENTER to confirm.
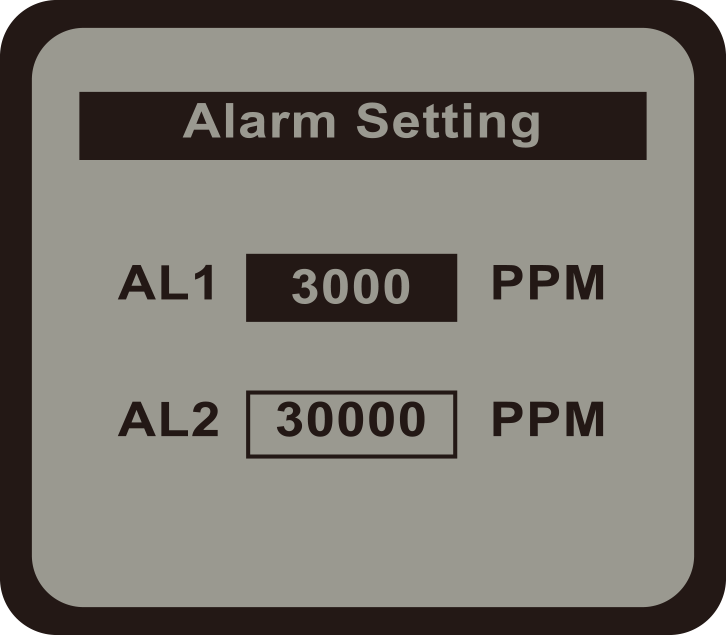
ALARM LEVEL SETTING
There are two user-adjustable Alarm level in the system to meet different local regulations. The low level Alarm-1
limit is from 3000 to 15000 PPM. The high level Alam-2 limit is from 15000 to 30000 PPM. Press ENTER to start
adjustment.
Use UP and DOWN buttons to adjust and ENTER to confirm.
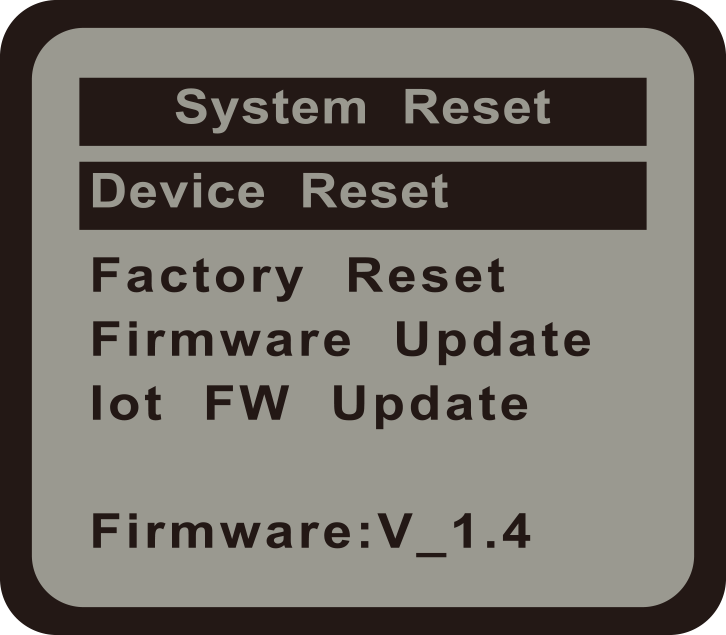
SYSTEM RESET
DEVICE RESET : he Device Reset allows the system to reset all sensors and
device stations have been addressed to the system. User can re-address all sensors and device station by pressing
addressing buttons.
FACTORY RESET : Restore the unit to factory default settings.
FIRMWARE UPATE : The TrolMaster systems allow users to receive a continual
update through a Micro SD cart. Just simply download the updated firmware from TrolMaster website to a Micro SD
card and insert it to the unit. Enter the firmware update page, the unit will be automatically updated by pressing
the confirm button.
DEVICE STATION ASSIGNMENT
The system can control up to 40 device stations. Each device stations can be linked to individual sensor or all
sensors for a customized programming. On the device list page, use LEFT, RIGHT, UP and DOWN button to select the
device sattion need to be assigned. Press ENTER to enter the assignment page
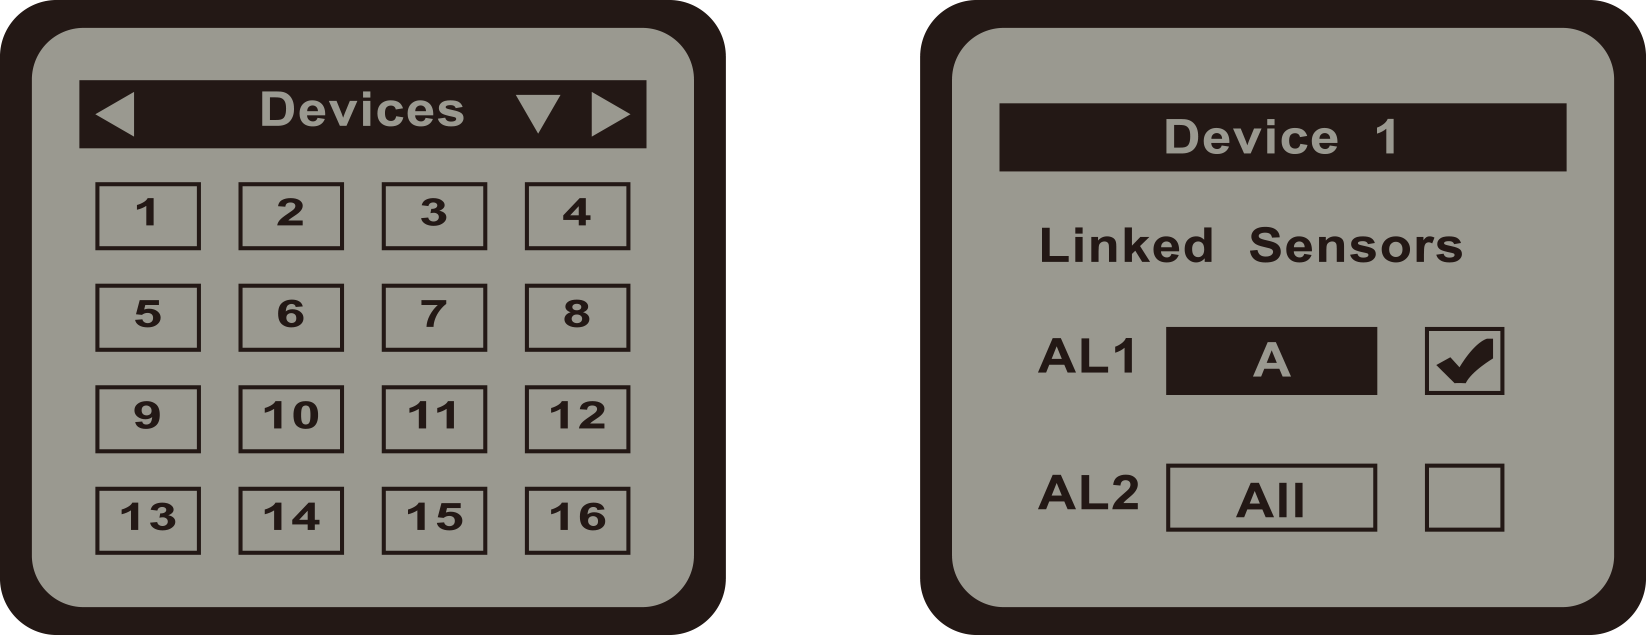
Use LEFT, RIGHT, UP and DOWN button to adjust the setting and press ENTER to confirm. The device station will be
activated when the linked sensor/sensors detected a CO2 level over the related limit setting.
General Information
WARRANTY
TrolMaster only uses high quality components. Under normal operating conditions,the mechanical and electronic
components are covered by a three-year warranty from the original date of purchase. For service, return the
Carbon-X Alarm System in the original packaging to your shop with the original sales receipt. Components that are
excluded from warranty are components that have failed due to abnormal usage.
In the case of defects of the Carbon-X Alarm System, the Controller will either be replaced or repaired using new
or reconditioned products or parts. If the Controller will be replaced this limited warranty shall apply to the
replacement product for the remaining initial warranty period, i.e. (three) 3 years from the date of purchase of
the original product.
RETURNS
All returns need to be done in the original packaging in order to avoid damages of the product during transport
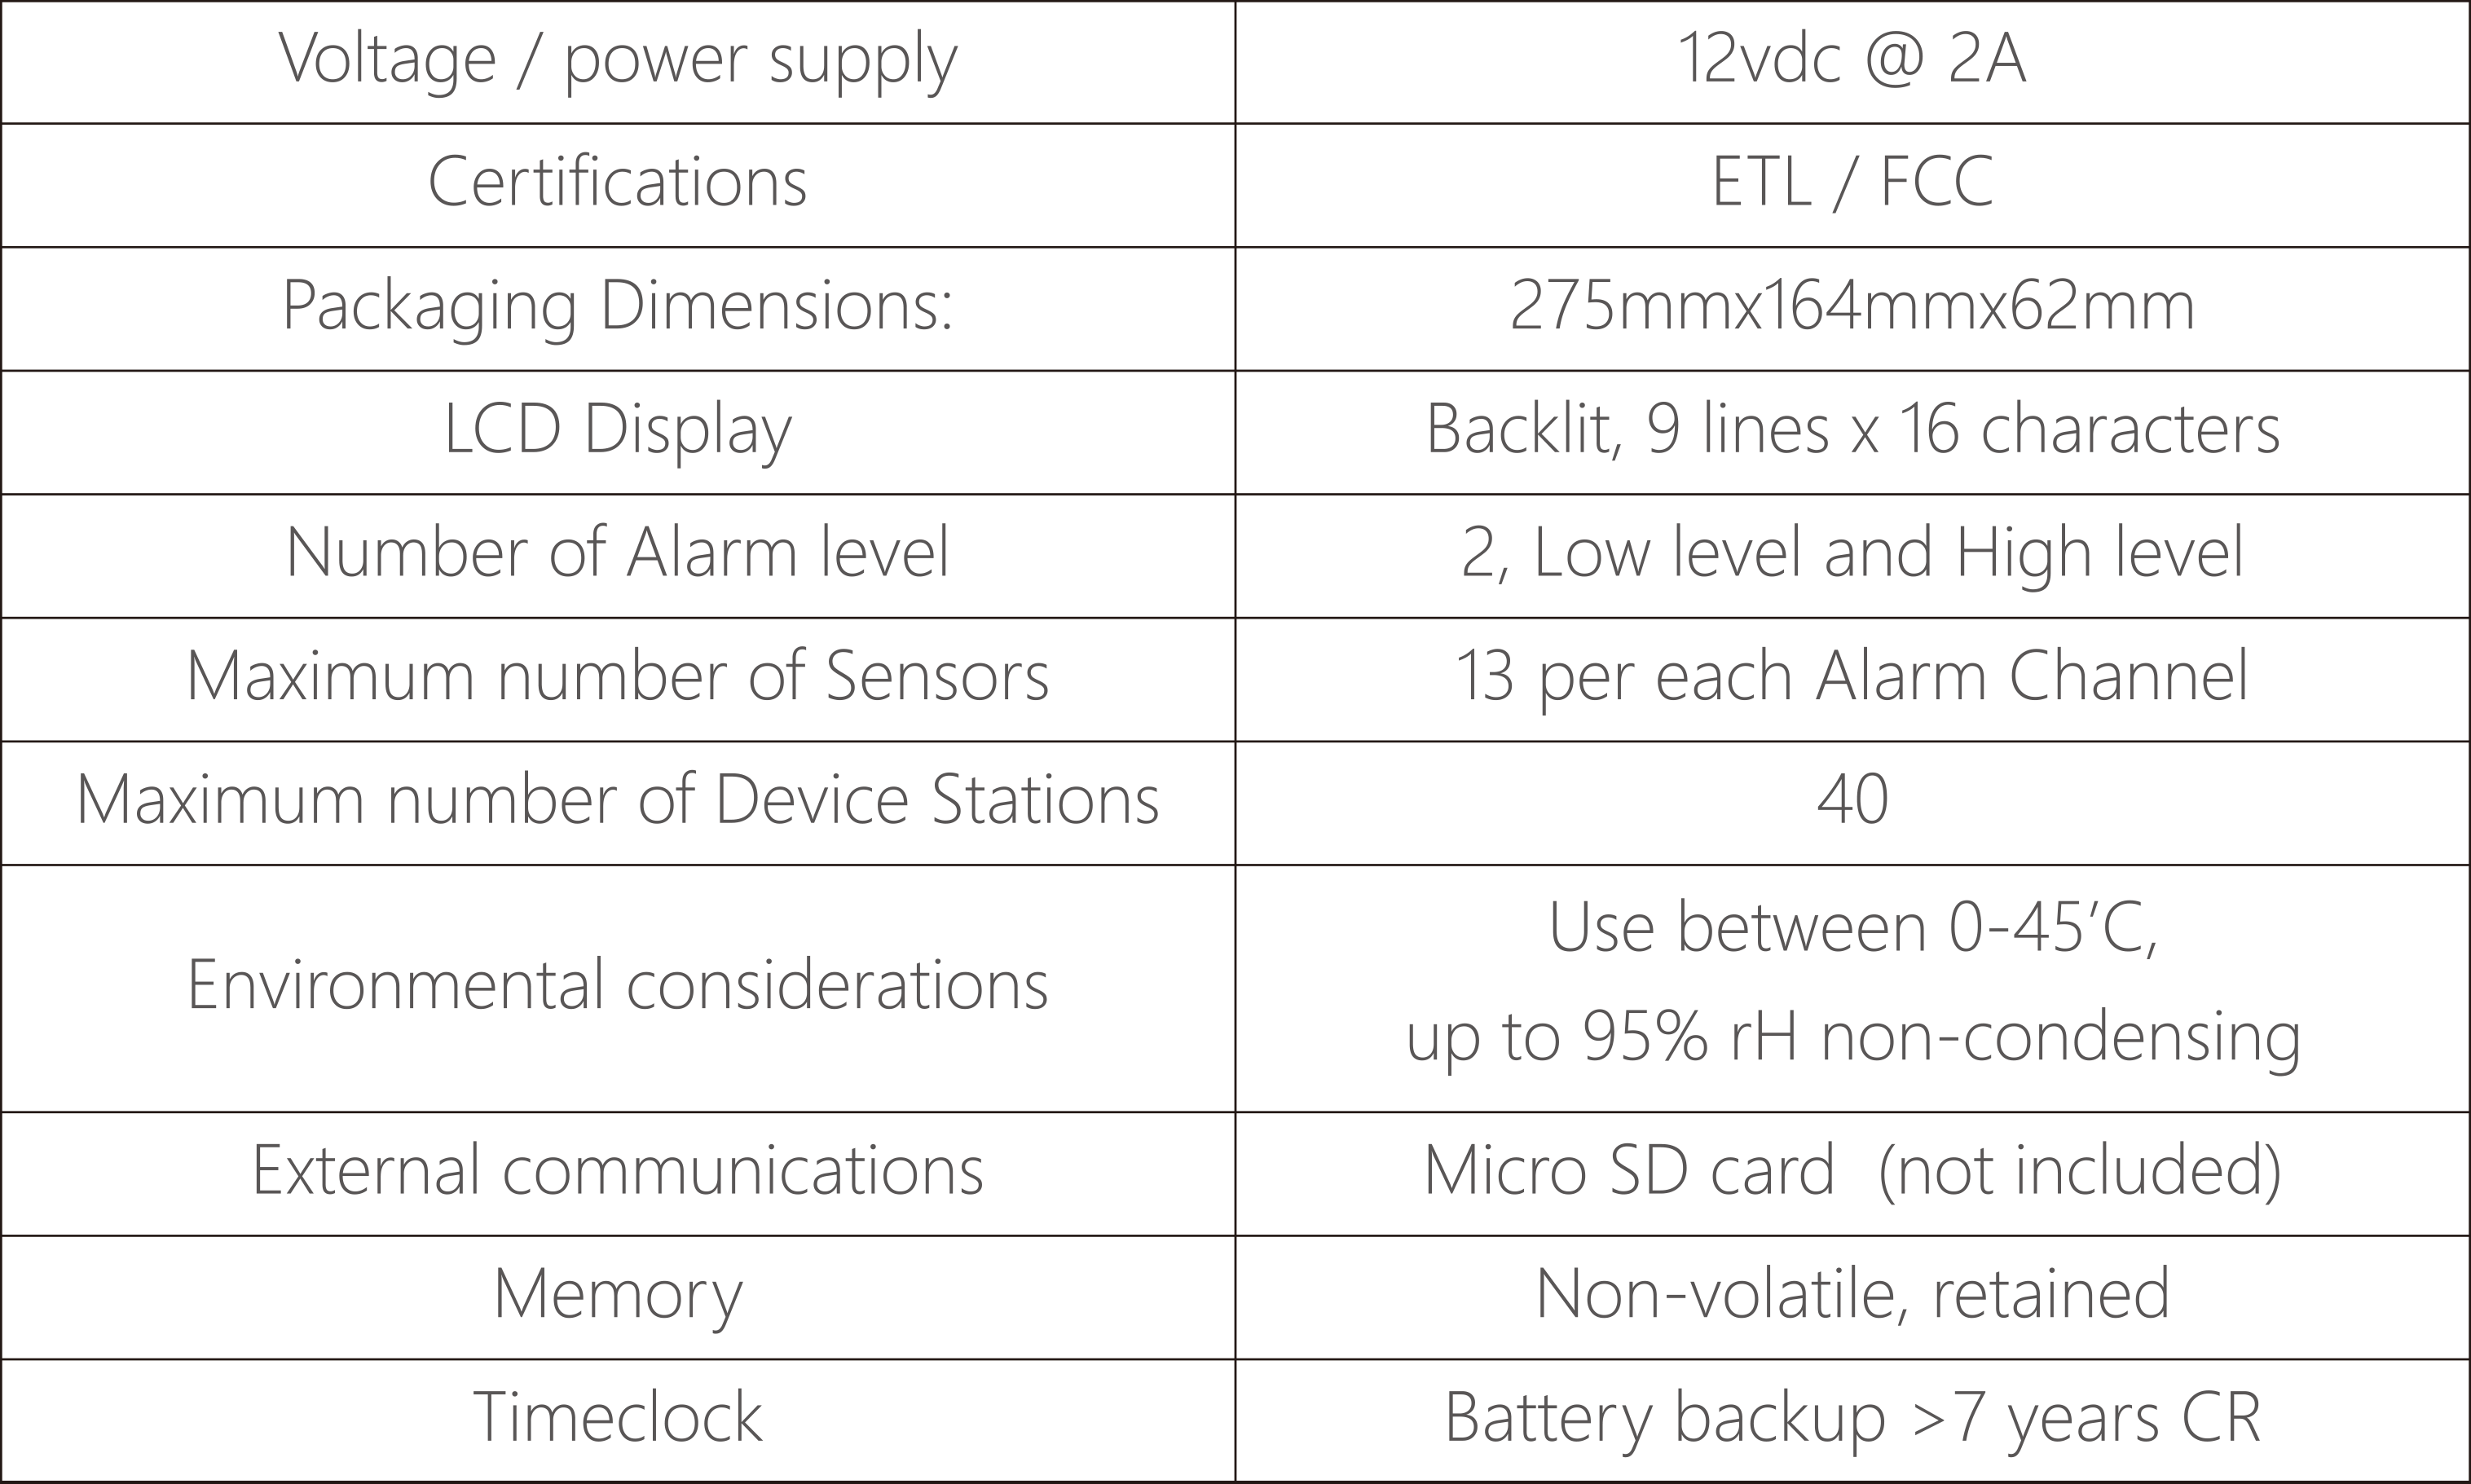
SPECIFICATIONS :
ENVIRONMENTAL AND DISPOSAL CONCERNS:
THIS PRODUCT CONTAINS A BATTERY AND OTHER COMPONENTS WHICH MUST BE
DISPOSED OF PROPERLY
This symbol displayed on a product, its accessories, or its packaging indicates that this product may not be
discarded as household waste. Dispose of the equipment through a recycling center that handles electronics and
electrical appliances. By disposing of the equipment in the proper and lawful way you will be helping to prevent
possible damage to the environment and risk to public health.